This page continues the story of Bob's build.
Making tabernacle
Construction of cabin
Sliding hatch
Grab rails
Overall view of boat
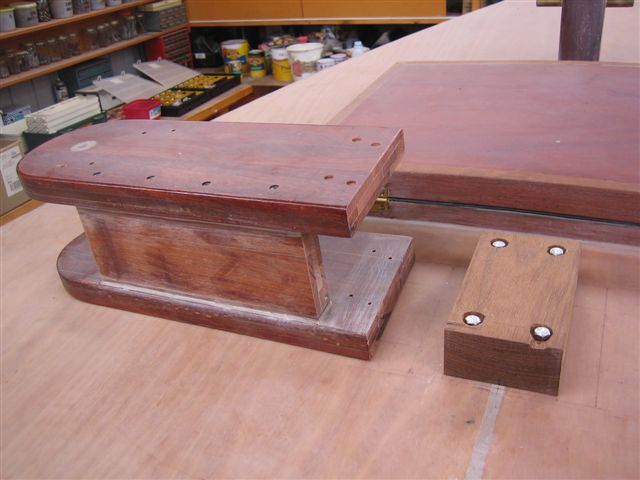
The tabernacle was laminated from 3 thicknesses of 3/8'' jarrah lining board using offcuts from our house renovation several years ago. This made it approximately 1 1/4 inches thick which is more than the 1 inch specified in the plans, but since we have all been making the overall height of the tabernacle 15 inches instead of 12" in the plans ( for better clearance of mast over cabin when de-rigged) then thicker walls are appropriate. Laminating the timber and laying the pieces like bricks all helps to make it as strong as possible. The tabernacle is screwed onto the deck mounted block shown in the picture. The block is 2 inches thick with the fixed and adjustable wedges on top of that, to ensure that the heel of the mast will clear the forehatch when being raised.
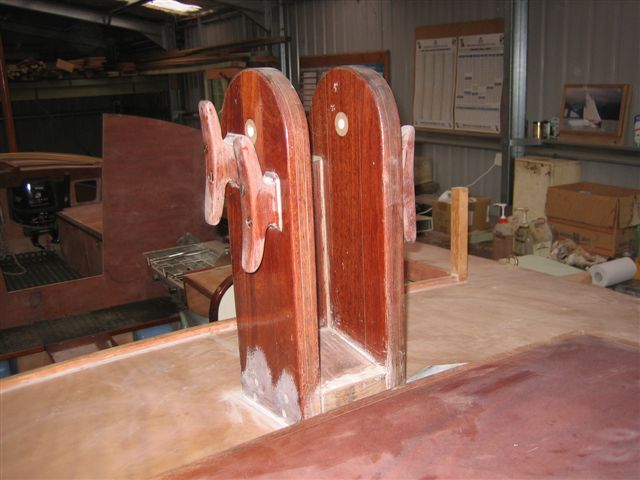
This picture shows the tabernacle in place. The cleats were made from laminated jarrah, and were surprisingly quick to make. They may be removed if I ever go for halliards mounted on the cabin top and accessible from the cockpit, but time will tell on that one.

Before starting on the cabin, it was an opportunity to paint the interior with unlimited head space.
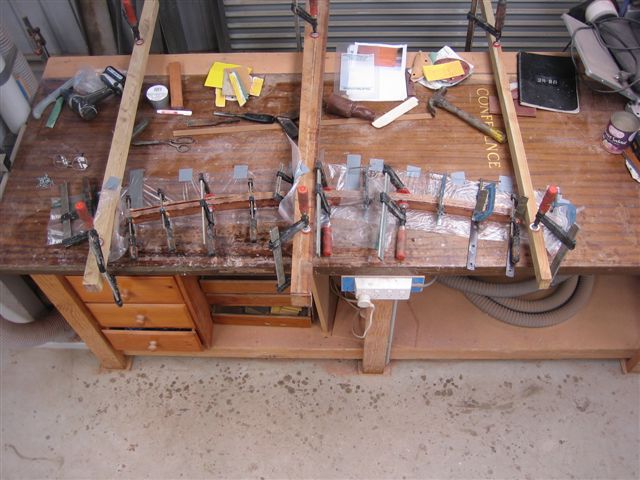
Laminating the cabin roof beams was relatively simple. Timber strips were formed around L shaped brackets screwed to the bench on a curve given by the plans. Each beam has a separate curve, but remarkably they all line up fore and aft on the cabin. It's not obvious in the picture but I used mahogany alternating with hoop pine for an interesting contrast.
We jump a bit here. The cabin sides are in place and the roof beams are fitted. The portlights are bronze from Classic Marine which are nicely finished. The front portlights are spaced further apart than plans to make way for the anchor box yet to come.
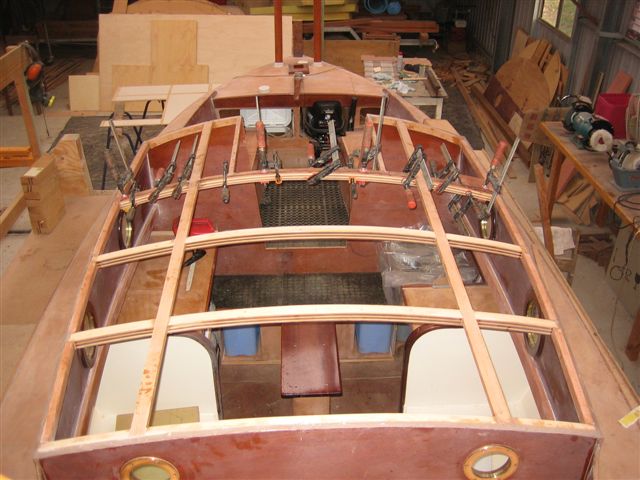
This shot shows the fore and aft members of the cabin roof which double as support for the grab rails, and also shows the pieces that form the sliding hatch opening. You might be wondering why I have clamps on the beam at Stn. 5. Well, my plans are very early, No. 7, and the beam here is shown on my plans as 7/8" wide x 2" high. (The other beams are 1 1/2 "wide x 1 1/4" high.) I faithfully followed this, and at the time went to NZ. Lying on my bunk on "Islesburgh", I soon noticed that Ian had his beams all the same. We compared plans and sure enough they are different. When I got home I found I was banging my head on this beam, so it was promptly changed. I stripped 3 laminations off the bottom and widened it with a specially laminated narrow beam. Hence the clamps which are gluing this in place. Ah well, Iain is notorious for his detailed plans, and they are, so I'm not really complaining.
The backing rings for the portlights inside the cabin are australian cedar. I was fortunate to have a piece of this beautiful rare timber.
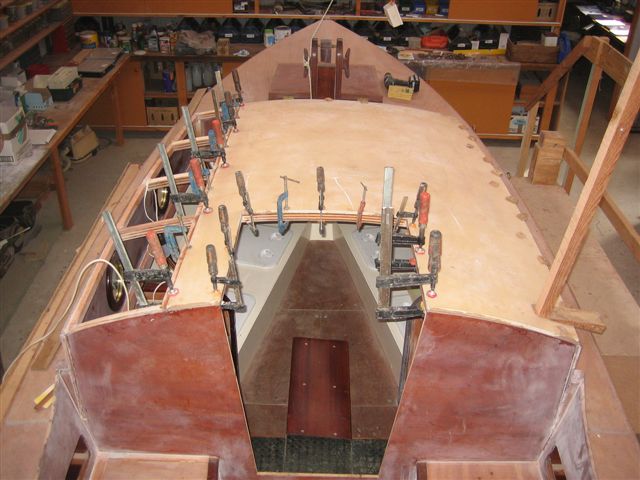
This photo shows how a 4 ft wide sheet of ply neatly fits onto the cabin framework. Gluing it was a BIG job. It took about 5 hours by myself and was done in the winter fortunately. With both surfaces coated with epoxy gunk, I carefully hinged the sheet with the outer cabin edge, then just let it drop. Fortunately it landed pretty much in the right place.
These two sections were glued and faired in which completes the cabin roof. The coamings for the sliding hatch are in place.
This picture shows the framing of the sliding hatch before gluing to check that it will slide without sticking. The timber is merbau. The cross piece in the centre is glued to the cabin roof and coamings as per plans and provides a 'stop' for hatch travel both fore and aft. Later this piece will have rubber strips on both sides to soften the closing and opening of the hatch.
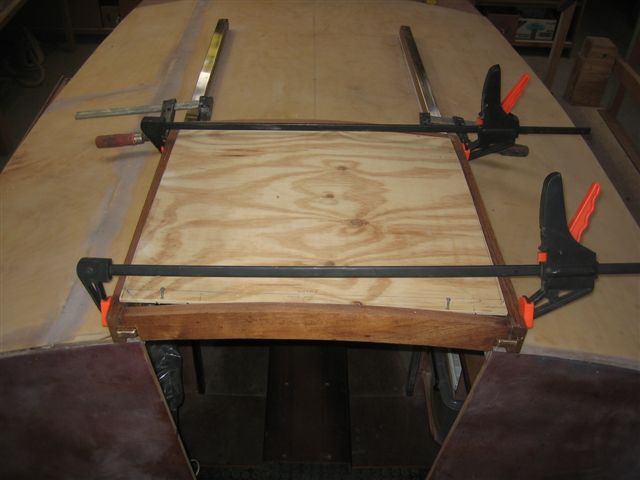
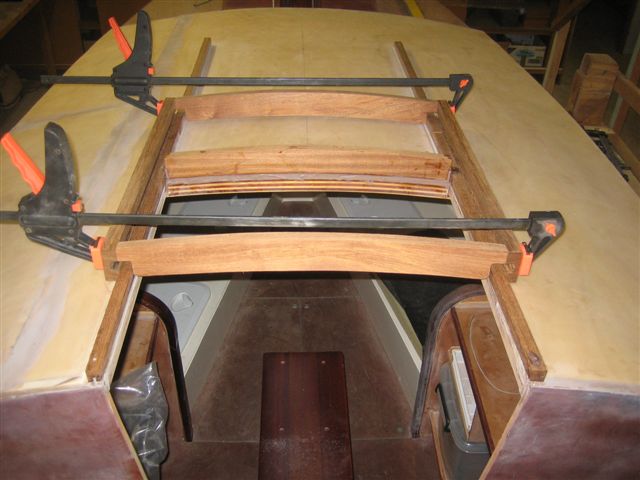
Scrap ply was used to determine the correct shape of the permanent mahogany ply infill. The runners are now in place and these are made up of 1 1/4"x1/8" brass strip glued to 1 1/4" x 3/8" timber to finish 1 1/4" x 1/2" overall as per plans. The runners are screwed (not glued) to the coamings, so that they can if necessary be raised to allow the hatch to slide over the 'stop', for removal from the boat. Thanks to Alan Hosler for his inspiration on this system.
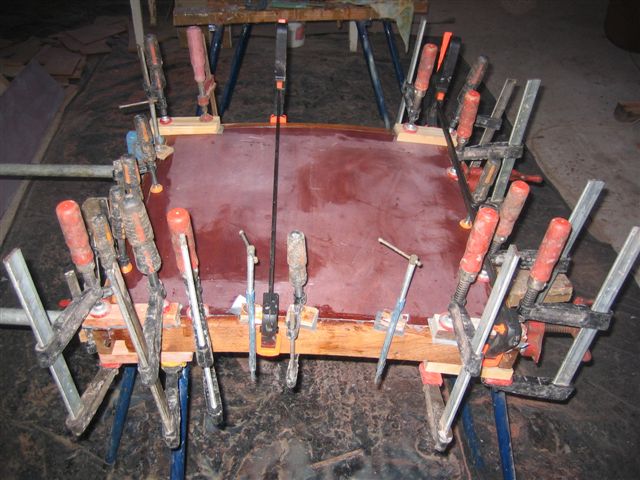
This crazy array of clamps was the result of gluing the frame and the ply infill all together at the same time. When it was set and cleaned up a bit, I held my breath as I tried it on the runners for a sliding fit. There were one or two adjustments, but it finally finished up sliding back and forth OK.
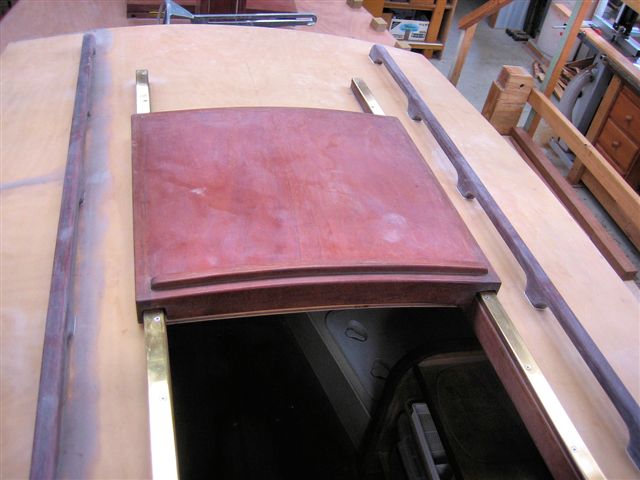
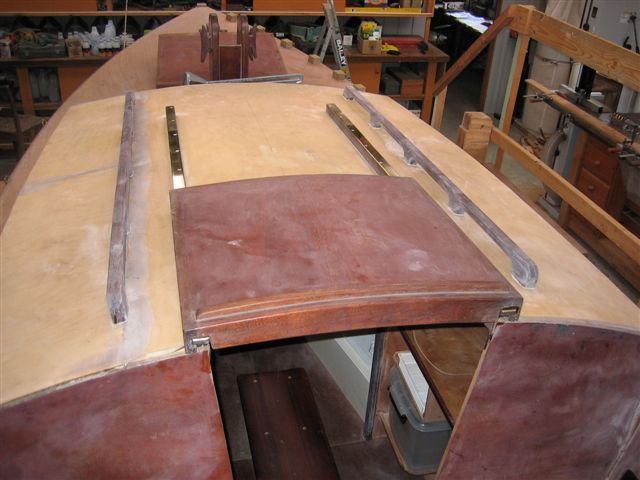
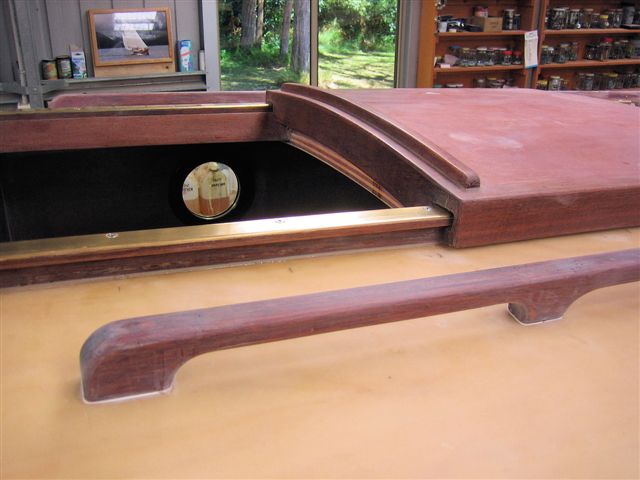
Here the hatch is finished, There were tidy up pieces glued on each side of the companionway opening.
Hatch finished and closed
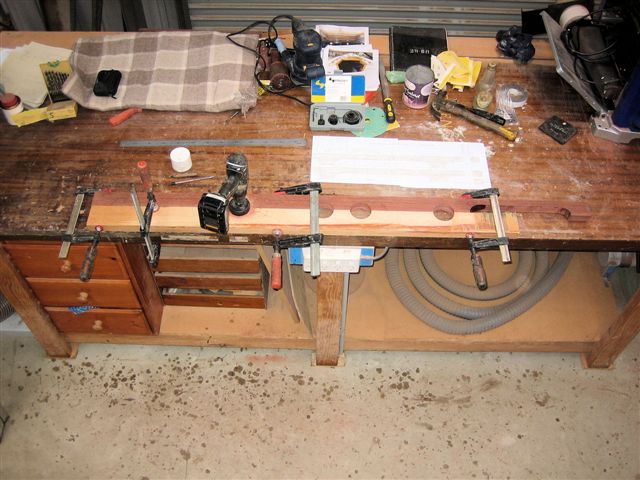
The grab rails, like the tabernacle, have been laminated out of 3 pieces of jarrah lining which makes them good and strong. They are 1 1/4" wide and 2" high overall with the grip 1" high. I found the best way to make the curve next to each pillar was to clamp a scrap piece of timber under the blank grab rail, and to use a hole saw as per the picture.
The grab rails have been attached to the cabin with c'sunk 1/4" S/S machine screws which pass through the roof and the fore & aft pieces 5/8"x1 1/2" inside the cabin. I drilled 3/8" holes from the top of the grab rail to about half it's depth and epoxied a 1/4" nut in there. The screw is inserted upside down from inside the cabin and screwed into the nut. The 3/8" hole is then filled with a tapered wooden plug and sanded over. Veritas plug cutters are tapered and I have found them really good. This is neat on the inside and the outside, and the grab rail can be removed if necessary.

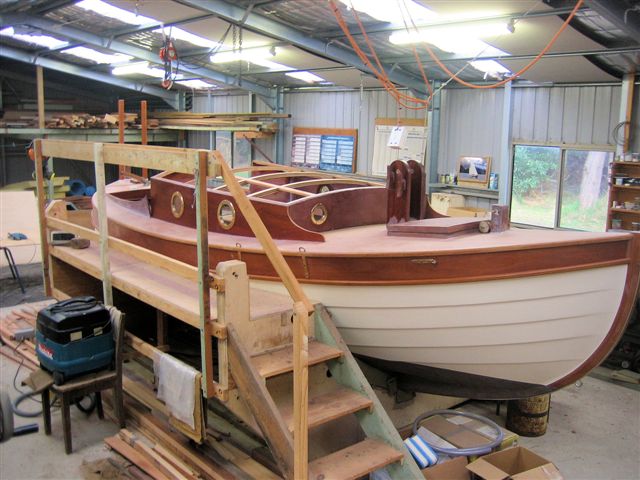
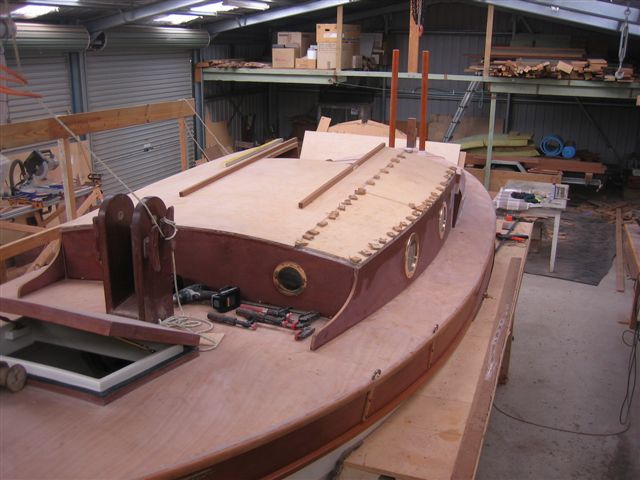
Photo taken 4-12-11. The blocks running around the gunwale are for fitting the toe rail which I am working on now. I have used the system described by Ian Milne where the blocks are fixed in place with hot melt glue, and can be tapped off afterwards with a hammer. It works and is quick, but more about that next episode.
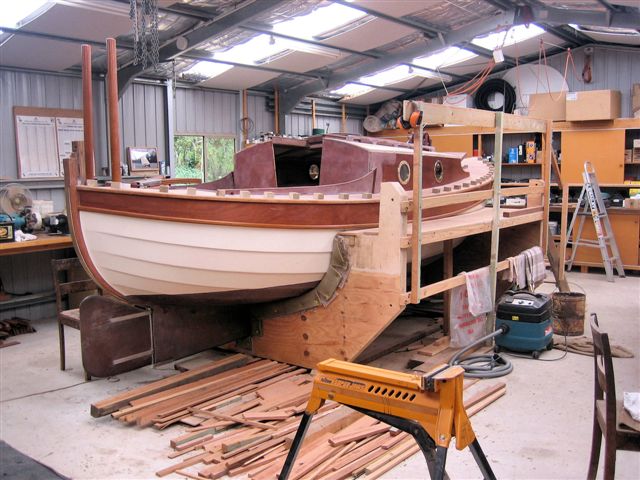
Photo taken same day, view from stern.